Showing posts with label sampler quilt. Show all posts

Monday, September 16, 2019

Tricia's Favorite Quilt Blocks -- Block 10 SAWTOOTH STAR

By now you've probably noticed that I like Star blocks as I've included several different stars in this Sampler quilt.

Why Stars?

Stars add a lot of movement to quilts AND there are so many different stars and variations out there to explore.  Star Blocks are also some of the oldest known quilt block patterns, too.

So, YES, Stars!

Our 10th block this time is:
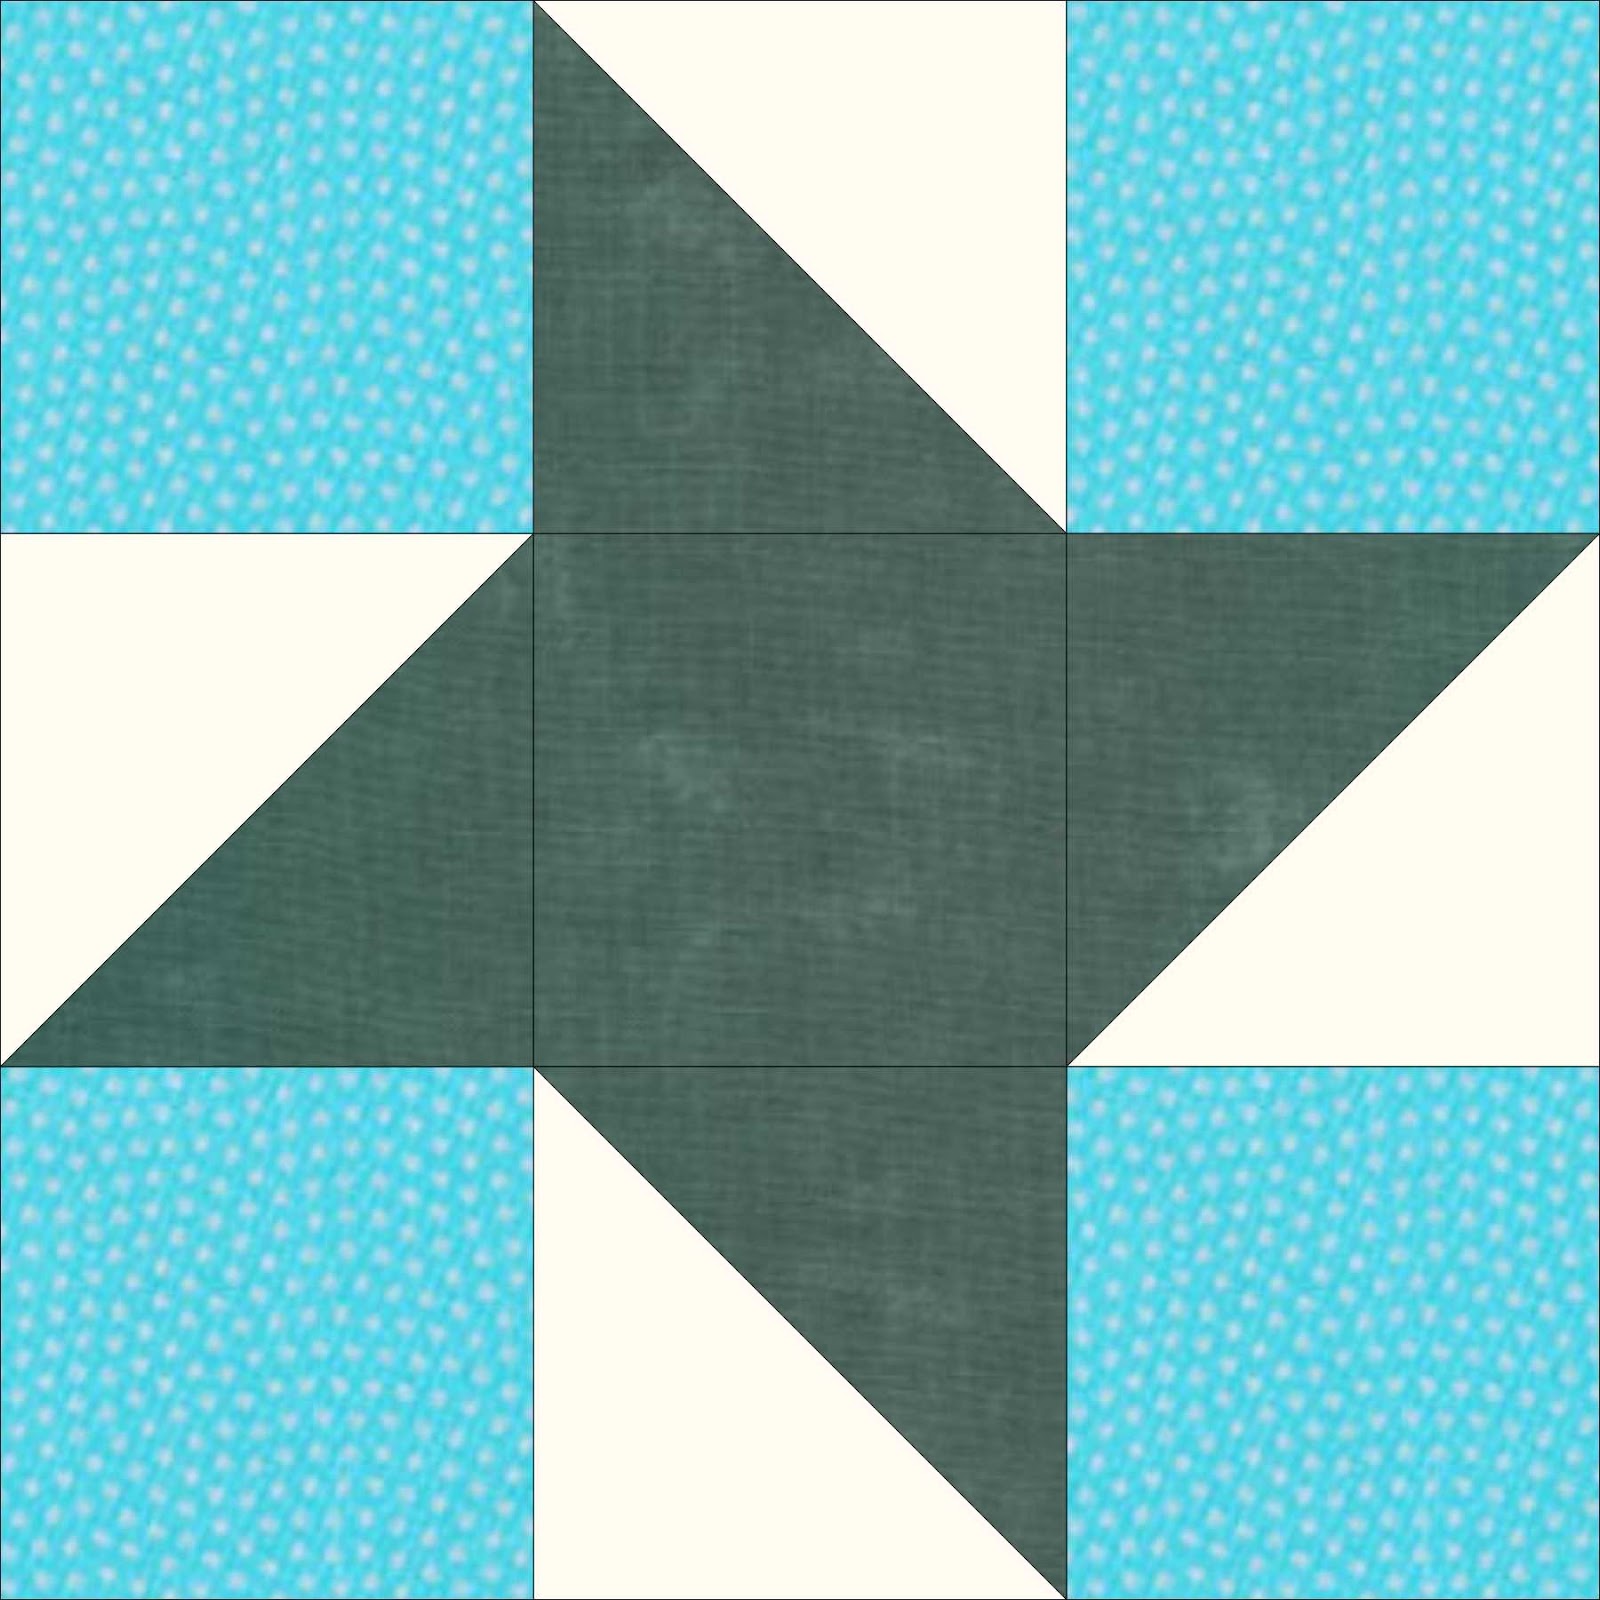
Sawtooth Star

which is one of the earliest Star block patterns.  
Have you ever made a Sawtooth Star?


Isn't this a great Star block?  I love the large unpieced center -- perfect for adding a fussy cut fabric OR you could add a smaller block in the center.  Sigh......Sew many ideas, sew little time......

Here's how to make a 12" finished Sawtooth Star block:

What you need:

Light fabric:  4 squares 3 1/2" x 3 1/2" and 1 square 7 1/4" x 7 1/4" -- cut this large square on both diagonals to get 4 triangles

Medium fabric:  4 squares 3  7/8" x 3 7/8", cut these squares on 1 diagonal to get 8 small triangles.

Dark fabric:  1 square 6 1/2" x 6 1/2" (you can fussy cut this square OR even replace it with a pieced 6 1/2" x 6 1/2" square -- maybe a 4 patch or 9 patch or even a smaller star)

Put the Block Together:

1.  Sew a medium triangle to each side of a background triangle.  Make 4 units.


 2.  Sew a light square to the ends of the unit from step 1.  Make 2.


3.  Sew a unit from step 1 to each side of the center 6 1/2" square.  Make 1.


4.  Now sew the block together like a 9 Patch with the center unit from step 3 sandwiched between the units from step 2.


 DONE and DONE!


Monday, September 2, 2019

Tricia's Favorite Quilt Blocks -- Block 9 FRIENDSHIP STAR

We're three-quarters of the way through my Favorite Quilt Block Sampler!  It won't be long until we put all 12 of our blocks together into a fun Sampler Quilt.  If you missed the first 8 blocks, you can find the block links along the left side of my blog.

Friendship has always been an important part of quilting.  I bet you have quilting friends and get together to do all sorts of things together.  Maybe you go on shop hops or to quilt shows, maybe you head to the nearest outlet mall, or maybe you have sewing days together.  Whatever you do, make sure to enjoy spending time with your quilting friends.

Block 9 for my Favorite Quilt Block Sampler is the sweet

Friendship Star 


I like that the Friendship Star block has a lot of variations.  Variations means unending options and design potential.  Here are a few good examples of what I'm talking about.  Both the quilts below alternate with a Nine Patch quilt block.  But that is where the similarities end.  The first quilt is set in straight rows while the second quilt is set on point.  Changing color values/fabric can also make a big impact on your quilt design.


Here's What You Need:

Light:  2 squares 4 7/8" x 4 7/8"

Medium:  4 squares 4 1/2" x 4 1/2"

Dark:  1 square 4 1/2" x 4 1/2 and 2 squares 4 7/8" x 4 7/8"

Make the Block:

1.  Layer a light 4 7/8" square with a dark 4 7/8" square.  Draw a diagonal line from one corner to the opposite corner.  Sew 1/4" on both sides of the drawn line.  Cut apart on the drawn line.  Open and press to yield 2 triangle squares.  Make 4 triangle squares.


2.  Assemble block like a Nine Patch with the medium 4 1/2" squares in the corners.  Pay close attention to which way the triangle squares are pointing.


3.  DONE!

Monday, August 19, 2019

Tricia's Favorite Block Tutorials -- Block 8 CHURN DASH

It's time for Block Number 8 in my Favorite Block Tutorials.  I hope that you've been following along and maybe even trying out some of these fun blocks.

Here are the links for the previous 7 blocks if you have missed one:

Block 1

Block 2

Block 3

Block 4

Block 5

Block 6

Block 7

Now that you're all caught up, let's make Block 8 --

Churn Dash


The Churn Dash Block is an old favorite of mine.  I have made many quilts using this block.  One of my most interesting ones was called Halloween Dash and was published in Quilter's World Magazine some years ago.

 
Can you see the spiderweb machine quilting motifs in the middle of the big Church Dash blocks?  Aren't they sew cute?

What you need:

Light:  2 squares 4 7/8" x 4 7/8", 1 square 4 1/2" x 4 1/2", and 4 rectangles 2 1/2" x 4 1/2"

Medium/Dark:  2 squares 4 7/8" x 4 7/8" and 4 rectangles 2 1/2" x 4 1/2"

Here's what you do:

1.   Layer a light 4 7/8" square right sides together with a medium/dark 4 7/8" square.  Drawn a diagonal line from one corner to the opposite corner.  Sew 1/4" away from both sides of the drawn line.  Cut apart on the drawn line.  Open triangle squares and press.  Make 4 triangle squares.


2.  Sew a light 2 1/2" x 4 1/2" rectangle long sides together with a medium/dark 2 1/2" x 4 1/2" rectangle.  Make 4.


3.  Sew the block together like a Nine Patch.


4.  And you're done!


Monday, July 22, 2019

Tricia's Favorite Block Tutorials -- Block 7 OHIO STAR

Hello Again, Dear Friends!


I hope everyone is having fun with these quilt block tutorials.  In case I didn't mention it before, I plan to do 12 block tutorials and then I will do a tutorial on putting the 12 blocks together into a throw-sized Sampler Quilt!  So stick with me and you'll have a pretty nifty quilt when we're all done.

Here are the links for the first 6 blocks if you're just joining us:

1.  Shoofly

2.  Courthouse Steps

3.  Flying Geese

4.  Rail Fence

5.  Electric Fan

6.  Eccentric Star


Okay, now that that's out of the way, let's jump right into our next block: 

OHIO STAR


  Did you know the Ohio Star Quilt Block is connected to John Brown, the abolitionist??????  

Hop over to Suzy Quilts to read more.


Here's what you need for one 12" (finished) block.


Dark Fabric:  1 square 5 1/4" x 5 1/4", cut on both diagonals to yield 4 triangles

Medium Fabric:  2 squares 5 1/5" x 5 1/4", cut on both diagonals to yield 8 triangles

Light Fabric:  1 square 4 1/2" x 4 1/2"

Background Fabric (white):  4 squares 4 1/2" x 4 1/2" and 1 square 5 1/4" x 5 1/4", cut on both diagonals to yield 4 triangles

Let's Sew it Together! 

1.  Sew a light triangle to a dark triangle.  Make 4.


2.  Sew a background triangle to a medium triangle.  Make 4.


3.  Sew the units from steps 1 and 2 together to make an Hourglass unit.  Make 4.


4.  Sew a unit from step 3 together between 2 white squares.  Make 2. 

5.  Sew a light square between 2 units from step 3.  Make 1. 

6.  Sew the rows together into an Ohio Star block.  SEW SIMPLE!


That wasn't too hard, was it????

Stay tuned for our next Block Tutorial in a couple weeks.

Know a friend who might enjoy this tutorial?  Please share.


Monday, April 8, 2019

Tricia's Favorite Quilt Block Tutorial -- Block 1 SHOO FLY


What's your favorite quilt block?


I have quite a few favorite blocks, actually.  Maybe you do too.

Most of the blocks that I am a fan of are quick and easy to make.  I really love quick and easy because then I can spend more time playing with my fabric.

I thought it would be fun to show you some of my favorite blocks and how to make them along with a few ideas on using them in your projects.  AND I will turn my favorite blocks into a SAMPLER QUILT so hold on to your blocks until the end of the series for a fun Sampler Quilt setting.


 I LOVE the Shoo Fly block.  

When I was a new quilter, I cut out bunches of squares and triangles and hand-pieced them, eventually having enough to make a twin-sized quilt.  To be honest, the quilt didn't turn out very well because I didn't know then what I know now about quilting, but the important thing was that it got me excited to make MORE QUILTS.

According to the website Quilting in America, the block was "named after a wild plant with domed flowers called clover broom or shoo-fly, this 9-patch block originated around 1850 and became popular in the late 1800s."  For more history of the Shoofly block, visit Quilting in America.

Let's make a 12" finished Shoo Fly block!


What you need:

Medium/Dark fabric -- 2 squares 4 7/8" x 4 7/8" and 1 square 4 1/2" x 4 1/2" 

Light Fabric -- 2 squares 4 7/8" x 4 7/8" and 4 squares 4 1/2" x 4 1/2"

Here's what you do:

1.  Layer a 4 7/8" medium/dark square right sides together with a light 4 7/8" square.  Draw a line from one corner to the opposite corner diagonally.

2.  Sew 1/4" away from both sides of the drawn line.

3.  Cut apart on the line.   Voila!  You have 2 half square triangle blocks (HSTs).

4.  Repeat steps 1-3 to make a total of 4 HSTs.


Now here's the easy part -- the Shoo Fly block is simply a 9 Patch block in disguise!  Tehehehe!


5.  Sew a light 4 1/2" square between 2 HSTs as shown.  Make 2 rows.


7.  Sew the row from step 6 between the rows from step 5, flipping the unit on the bottom to make a Shoo Fly block.


And there you have it -- one 12 1/2" Shoo Fly Block!  Yay!  Go you!